Instructions for GetAccept – SuperOffice merge fields
This will help you transfer data from SuperOffice automaticially to your GetAccept templates, speeding up the creation processes greatly.
1. Login to GetAccept
2. Click on Content Library on the left-hand side
3. Click on an existing document, or create a new

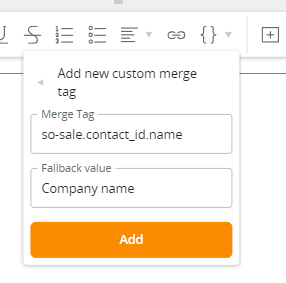
4. Click on Add new custom merge tag at the bottom of the dropdown
5. In the Merge Tag input, add any of the variables from the table below.
Make sure to remove any spaces before/after.
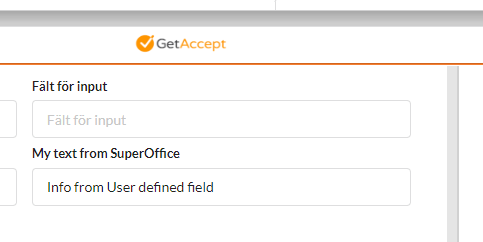
The example below will add the name of the company connected to the sale.
Add your label to Fallback Value, describing what field it is
6. Now SuperOffice will populate the information directly in the template.

Below you will find the most common variables
SuperOffice SALE
Use these fields for fetching data when sending out from the Sales module in SuperOffice
Sale Fields
| Field in SuperOffice | Merge tag |
|---|---|
| Heading | so-sale.heading |
| Description | so-sale.text_id.text |
| Amount | so-sale.amount |
Company fields from SuperOffice Sale
| Field in SuperOffice | Merge tag |
|---|---|
| Name | so-sale.contact_id.name |
| VAT number | so-sale.contact_id.orgNr |
| Department | so-sale.contact_id.department |
| Number | so-sale.contact_id.number2 |
| Our contact | so-sale.contact_id.associate_id.fullName |
| Postal address | so-sale.contact_id.address/line1 |
| Postal zipcode | so-sale.contact_id.address/zip |
| Postal City | so-sale.contact_id.address/city |
| Visiting street line 1 | sos-streetAddress/line1 |
| Visiting street line 2 | sos-streetAddress/line2 |
| Visiting street line 3 | sos-streetAddress/line3 |
| Visiting country | sos-streetAddress/county |
| Visiting city | sos-streetAddress/city |
| Visisting zip | sos-streetAddress/zip |
| Visisting State | sos-streetAddress/state |
| Visisting Adress formated | sos-streetAddress/formatted |
| Company phone | so-sale.contact_id.phone/formattedNumber |
Recipient
| Field in SuperOffice | Merge tag |
|---|---|
| Firstname | so-sale.person_id.firstname |
| Lastname | so-sale.person_id.lastname |
| so-sale.person_id.emailAddress | |
| Phone | so-sale.person_id.mobile/formattedNumber |
| Title | so-sale.person_id.title |
Sender
| Field in SuperOffice | Merge tag |
|---|---|
| Firstname | so-sale.associate_id.person_id.firstname |
| Lastname | so-sale.associate_id.person_id.lastname |
| so-sale.associate_id.person_id.emailAddress | |
| Phone | so-sale.associate_id.person_id.mobile/formattedNumber |
| Title | so-sale.associate_id.person_id.title |
SuperOffice COMPANY
Use these fields for fetching data when sending out from the Company module in SuperOffice
Company fields from SuperOffice Sale
| Field in SuperOffice | Merge tag |
|---|---|
| Name | so-contact.name |
| VAT number | so-contact.orgNr |
| Department | so-contact.department |
| Number | so-contact.number2 |
| Our contact | so-contact.associate_id.fullName |
| Postal address | so-contact.address/line1 |
| Postal zipcode | so-contact.address/zip |
| Postal City | so-contact.address/city |
| Visiting street line 3 | sos-streetAddress/line3 |
| Company phone | so-contact.phone/formattedNumber |
Sender
| Field in SuperOffice | Merge tag |
|---|---|
| Firstname | so-contact.associate_id.person_id.firstname |
| Lastname | so-contact.associate_id.person_id.lastname |
| so-contact.associate_id.person_id.emailAddress | |
| Phone | so-sale.associate_id.person_id.mobile/formattedNumber |
User defined Text fields
The user defined fields are the unique fields created by your administrators, they are usually located under the More tab in SuperOffice.
Please follow the below guide to find your merge tags for User Defined fields in SuperOffice.
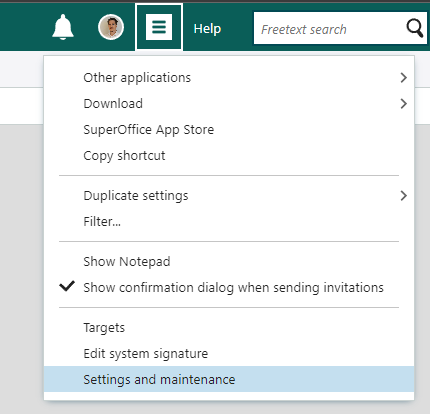
- Login to SuperOffice Settings and maintenance
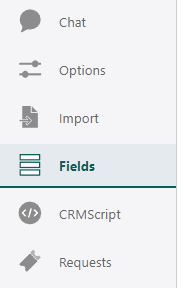
- On the left hand side, click on Fields

- Here you will find your user defined fields, click on the tabs in the top to select for example Sale to see your user defined fields from Sales.
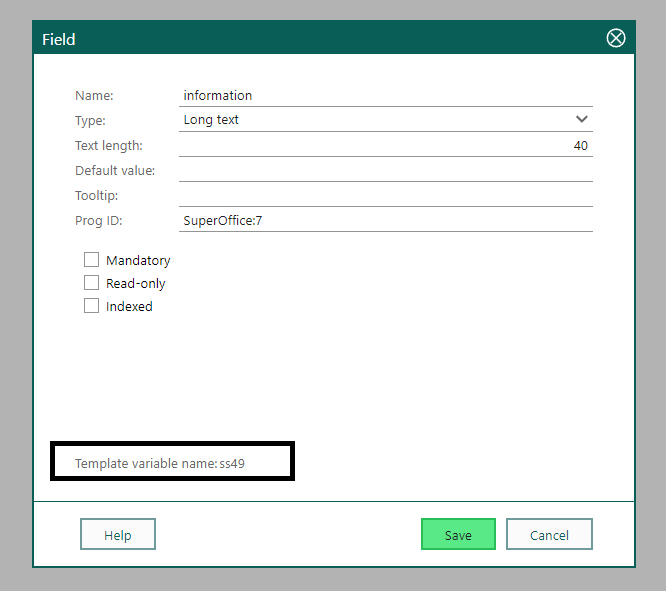
- Find the Field you want to use as a Merge tag and doubleclick on it
- Locate the Template Variable Name
- Now, we need to write our custom merge field for that field.
- First, similar to other mergefields, we need to specify if the field exists on Company, Sale, Person etc.
Start your faviorite text editor (notepad or similar, please dont use Word since it tends to add additional characters) - Start writing the following:
For sale: so-sale.userdef_id.
for company: so-sale.contact_id.userdef_id.
for person: so-sale.person_id.userdef_id.
for Associate: so-sale.associate_id.userdef_id. - Now, we need to specifiy the specific field we want to use.
if the characters are: ss you should use the word string
if the characters are: sl you should use the word long
if the characters are: sd you should use the word doubleIn the above example (point 5), we have the template name: ss49.
Since the characters are ss, we need to write the word string followed by the number. for example: string49
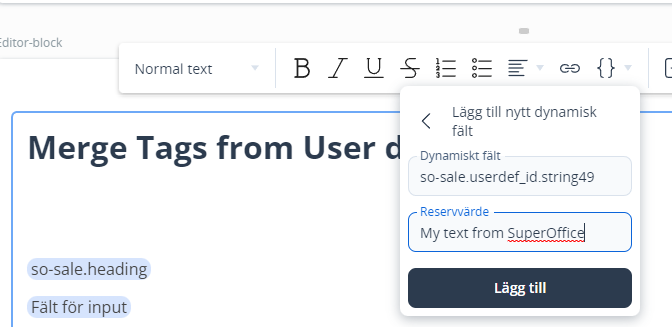
The complete merge tag would then be:
so-sale.userdef_id.string49Additional examples:
Template name: sl27 = long27
Complete merge tag: so-sale.userdef_id.long27Template name: sd12 = double12
Complete merge tag: so-sale.userdef_id.double12 - Copy your merge field text and follow the instructions at the top of this page, in the field Merge tag you add the merge tag you just created
- When you start working with your template within SuperOffice, the field will automatically be populated
Please note
If you have many user defined fields in SuperOffice, you might need to switch from userdef_id to userdef2_id
For example: so-sale.userdef2_id.string49
User defined checkboxes
- Create a new Checkbox
- click on “Click to add Label”
- Select the Merge tags button in the menu that appears
- Click on the button “Create new custom merge tag”

- In the Merge tag field, add the SuperOffice path to the User defined checkbox, please see the section above to find your path.
- In the Fallback value, please add the label you want for the checkbox.

- You are now done, and can go back to SuperOffice and select your template, and the checkbox will show up and will reflect the checkbox state of the SuperOffice checkbox.